 QMidiArp - A
MIDI Arpeggiator, Step
Sequencer and Controller LFO
QMidiArp - A
MIDI Arpeggiator, Step
Sequencer and Controller LFO
Documentation
Index
-
- MIDI
Connections
- Main Toolbar
- MIDI
Clock operation
- JACK
Transport Client Operation
- Global Storage
- Arpeggiator
Modules
- LFO
Modules
- Step
Sequencer Modules
- Settings
- MIDI
control
- Event Log
- Example Files
- Comand Line Usage and Options
- Supported Files
Click
on icon for module documentation


Connections and General
Operation
When
no commandline
options are given, QMidiArp starts as a JACK MIDI client
with an input port and two output ports. You can now connect the MIDI
ports. In the following example, an Edirol UA-25 interface is connected
to a MIDI Keyboard. A2jmidid is used (a2j -e) to bridge the ALSA MIDI
world to Jack MIDI.
In Ladish or Patchage, this would look like the
following, the MIDI connections are in red, the audio connections in
blue.

In QJackCtl you would connect QMidiArp like the following (note that
we're looking at the MIDI tab that
shows JACK MIDI connections only):

The a2j JACK MIDI client shows the ALSA MIDI devices and programs
(here only necessary for the UA-25 hardware interface. The JACK MIDI
elements (such as qmidiarp and yoshimi) show up directly.
If you don't have a2jmidid or only have ALSA MIDI programs or don't
want to use JACK MIDI, you can use QMidiArp with ALSA as well.
For starting QMidiArp as an
ALSA
client, use the -a option, and you would see something like this when
you start
ZynAddSubFX and qmidiarp -a

Note that in this example we are looking at the ALSA tab showing
ALSA MIDI connections.
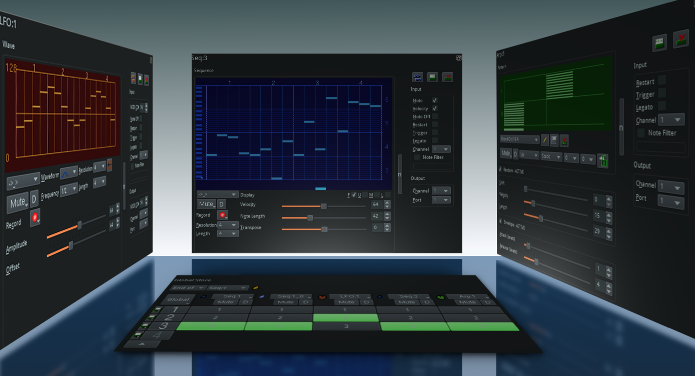
Main Toolbar
The QMidiArp main toolbar will
show up like this after starting the program:

New modules can be created by
clicking one of the Add Arp...,
Add LFO...
or
Add Step Sequencer...
buttons, which will show a new
tab with the chosen module in the main area. The modules can be renamed
or removed using the corresponding buttons or menu functions. Modules
can be detached from the main window to control and view them in
parallel. They can be brought back to the main window again by clicking
on the icon on the left side of each module title bar. They can also be
aligned side-by-side within the same window if the main window is
stretched sufficiently before reinserting a module. The entire
setup containing all arps, sequences and LFOs in the tab bar along with
the parameters set in the Settings
window can be saved to or loaded from
a QMidiArp XML file (.qmax). The tempo
of the queue can be set in beats per minute and
affects all modules.
To make QMidiArp play whatsoever, you need to start it using the blue arrow
button.
MIDI
Clock operation (ALSA MIDI only)
QMidiArp can use incoming MIDI clock
events as clock and start/stop
control source.
If the MIDI clock button
right of the tempo box is pressed, the running ALSA queue is stopped,
and QMidiArp
will wait for an incoming "MIDI Clock Start" event from an external
source connected to QMidiArp's MIDI input. Once this event is received,
the queue is started using MIDI realtime clock events as clock
source. QMidiArp will best remain in sync with the incoming MIDI clock
if its internal tempo value (see above) approximately corresponds to
that of the incoming clock. The MIDI clock tempo is,
however, measured while the queue is running. Therefore, if the tempos
of the MIDI clock and that of QMidiArp differ, synchronization should
become stable from the second queue start. The queue will stop when a
MIDI Clock Stop event is received. During MIDI Clock operation,
QMidiArp's own clock start and stop functions as well as adding or
loading new setups are disabled. They are enabled again by unchecking
the MIDI clock button.
JACK
Transport Client Operation
When the Jack Transport Connect
button is pressed, QMidiArp will try to connect to a running Jack
server and then function
as a Jack Transport client, i.e. set its tempo and remain synchronized
to a running Jack Transport master. The Jack button will be released
automatically
if QMidiArp gets disconnected from Jack by a possible Jack shutdown or
if Jack is not available at connection time.
Note:
MIDI Clock and Jack Transport button states will be saved with
the QMidiArp session file, and get active or inactive when a new
session
file is loaded.
Groove

The
Groove
sliders control a linear shift of timing, length and velocity within
each beat of the output pattern. This can be used to create swing
timing and accent. Groove settings apply to all modules
simultaneously.
Settings

The Settings window allows you to configure if and to which port incoming
events that do not match any module's input filter are forwarded (
unmatched
events). You can also set whether incoming controller events are
recognized for
muting and controlling
the modules separately. If this option is set, QMidiArp will recognize
MIDI control events that can be attributed to different parameters (see
MIDI Control
). By checking the compact module style
all new created modules will show with small GUI elements to be more
economic in space when distributed as separate windows over the
desktop.
All
settings in this dialog are stored along with the module data in
the
qmax session file.
MIDI
control
QMidiArp supports MIDI control events
if the Modules controllable
by MIDI CC
option is checked in the
Settings
dialog.
MIDI
Learn
Controllers
can be attributed by right-clicking on the sliders or
mute checkbox in each module and selecting MIDI Learn.
QMidiArp will then wait for MIDI control events, and moving a MIDI
controller connected to QMidiArp's input will attribute this controller
to the control item. It is possible to add several MIDI controllers to
one item. If MIDI Forget
is selected, all controllers for that item are removed. If Cancel
MIDI learning
is selected, the learn process is stopped.
Note
that by default, mute controllers are interpreted as toggles,
i.e.
the mute state is toggled on reception of a value of 127 from the
attributed controller.
Control
Editor
 The
Control Editor
is accessible from the View
menu. Controls can be edited by MIDI control number, channel, and the
minimum and maximum values that are sent to the control item. Mute
controllers have a special behaviour. If minimum and maximum are equal,
the controller acts as toggler upon reception of the adjusted value.
If minimum is different
from maximum, the corresponding module will be muted upon reception of
minimum and unmuted upon reception of maximum as values.
The
Control Editor
is accessible from the View
menu. Controls can be edited by MIDI control number, channel, and the
minimum and maximum values that are sent to the control item. Mute
controllers have a special behaviour. If minimum and maximum are equal,
the controller acts as toggler upon reception of the adjusted value.
If minimum is different
from maximum, the corresponding module will be muted upon reception of
minimum and unmuted upon reception of maximum as values.
If
Remove
is pressed, the currently selected line will be removed, pressing
Revert
reloads the current controller settings. Pressing Cancel
quits the control editor without applying changes, and only if OK
is pressed, the edited control list becomes active.
Event
Log
The
Event Log
displays incoming MIDI events. It is displayed in the bottom area by
default, but can be hidden if not
needed or set floating as a top-level window on the desktop. Logging
can also be disabled generally or for MIDI Clock events only.
Example
Files
There are currently three demo arpeggios. The demo.qmax arpeggio was
intended to be used with the following sound types: Ch 1: Marimba, Ch
2: Celesta, Ch 3: Acoustic Bass, but you can get interesting results if
you use other instrument settings.
The
demo_seqlfo.qmax setup shows the use of the new sequencer and
LFO
modules playing in parallel. The sequencer outputs should be routed
to percussive synthesizer sounds. The LFO data is intended to act on
filter cutoff, which has the standard controller CC#74. ZynAddSubFX by
Paul Nasca reacts on these filter cutoff controllers. The "Bass 1"
and "Plucked 3" presets from this synthesizer work well with this demo
file.
Command
Line Usage and Options
qmidiarp
[OPTION] [file]
qmidiarp
{
--help
| --version
}
OPTIONS
- -p,
--portCount <num>
- Set the number of available MIDI output
ports to <num>. The
default
is 2.
- -h, --help
- Print possible command-line options and
exit.
- -v, --version
- Print version information and exit.
- -a, --alsa
- Use the ALSA MIDI backend
- -j, --jack
- Use the JACK MIDI backend (default).
- file
- Name of a valid QMidiArp (.qmax) XML file
to be loaded on start.
Supported
Files
*.qmax :
QMidiArp XML files containing session
data in XML text format.

 QMidiArp's French
language page on
QMidiArp's French
language page on